A Practical Guide to Brushed Concrete Driveways
Why Concrete Driveways?
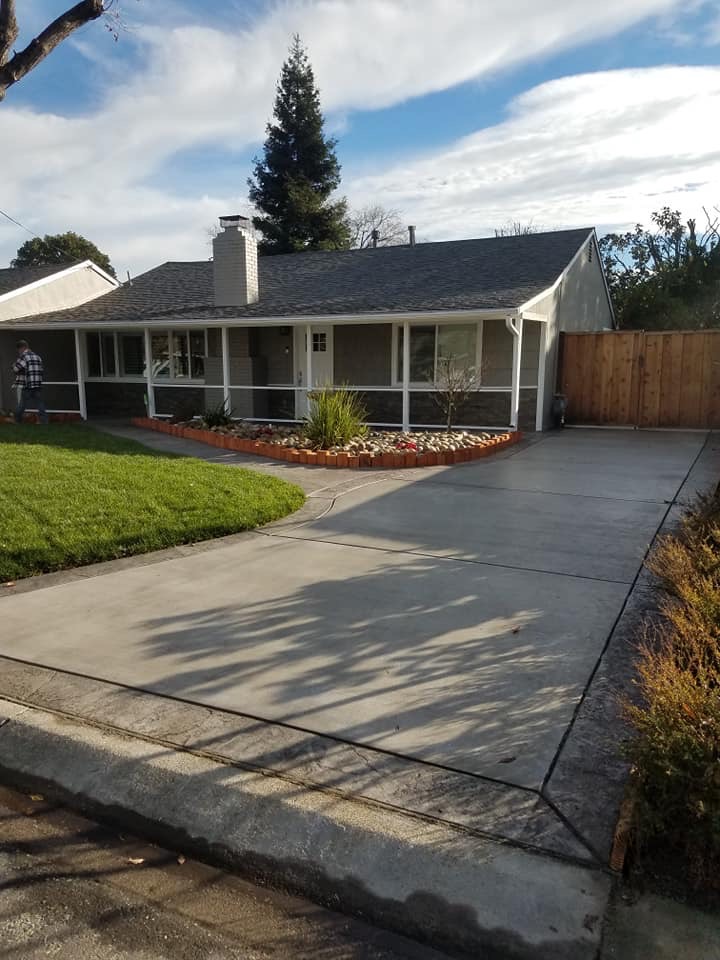
Concrete is a fantastic driveway material. It is adaptable, preferred for durability, appearance, and low maintenance, and indicates quality construction from the start. A concrete driveway solves all of these problems.
Concrete driveways have long been known to provide homeowners with trouble-free service. The reason is straightforward. Concrete is long-lasting, with many driveways lasting 30 years or more without major maintenance. Concrete, like many other high-quality purchases, saves money in the long run.
From the street to the garage, a custom-designed concrete driveway not only adds visual appeal but also long-term quality and value to your home.
Planning
The quality of the finished concrete driveway is always the result of careful planning. Spending time at this stage can aid in the elimination of potential problems later in the construction process. The size of the driveway is one of the first things to consider.
A single-car driveway should be eight to nine feet wide, while a double-width driveway should be 15 to 18 feet wide. If the distance from the street to a two- or more-car garage is sufficiently long, the initial entry approach can be single-car width and then widened near the garage to accommodate all car stalls. Extra parking or a turn-around area can be included if space is available. Also, during the planning stage, consider adding a concrete patio or porch addition.
For passenger car driveways, non-reinforced pavement four inches thick is standard. A thickness of five inches is recommended for heavier vehicles. To prevent standing water, the driveway should be sloped towards the street by at least 1%, or 1/8 inch per foot, for proper drainage.
Concrete can now be formed into almost any shape, texture, pattern, or color. It is a cost-effective way to add a new dimension of quality and elegance to your home.
Pattern stamping is a colorful way to dress up plain concrete paving. The driveway is essentially cast-in-place concrete that has been colored and imprinted with a pattern designed to resemble brick, tile, cobblestone, or other various patterns. Bromide, swirl, and exposed aggregate are examples of textured finishes.
Site Preparation
After deciding on a basic driveway design, the next step is to prepare the site. Consider the replacement of an existing asphalt driveway with a traditional, broom-textured concrete driveway. In a nutshell, this is how a typical site preparation goes.
The existing thin layer of asphalt is easily removed and carted away with a forklift truck. The existing gravel base can be reused, but because the new concrete driveway will be thicker, some of the gravel will need to be removed to maintain proper elevation.
A vibratory plate compactor is used to compact the gravel base. A gravel subbase is not required for a new driveway, but the subgrade must be compacted similarly.
Ordering Quality Concrete
ASTM C-94 is the American Standard for Testing and Materials specification for ready mixed concrete for driveways. By adhering to the correct specifications and construction methods, problems such as random cracking can be avoided. As an example:
Compressive strength – 4,000 psi after 28 days is sufficient for most climates.
Air content – in all climates, air content should be in the range of 5% to 7%. Air content improves workability without the need for water, in addition to improving the long-term durability of the concrete.
Slump – make sure to include the word “slump.” Suggest a four-inch slump for driveway paving. Slumps of more than five inches should be avoided at all costs.
Aggregates – designate the size of the coarse aggregate. Generally, 3/4 or 1 inch is normally used. For a slightly higher fee, chert-reduced aggregate can be ordered to help prevent pop-outs.
For milder climates, lower strengths and air contents may be appropriate. Consult your ready mixed concrete producer for appropriate mixes in your area.
Placing & Finishing
Ready-mixed concrete should be delivered and discharged as soon as possible when laying the driveway. A time frame of one to eleventy-two hours is usually considered reasonable. The sequence for laying out and finishing the new driveway is as follows.
Spray or brush all forms with form oil, and wet the subgrade. Do not use too much water. Before pouring concrete, there should be no puddles or standing water on the subgrade. The concrete should be placed as close to the finished position as possible, either directly into the chute or into wheelbarrows, and wheeled to its final location. To ensure complete filling along the sides of the forms, shovels should be used.
To smooth the surface and raise the slab to its proper elevation, strike off the concrete with a straight piece of lumber. Examine the area for any low spots. Another pass with the piece of lumber ensures a consistent surface for the subsequent finishing operations. A bull float is worked back and forth across the surface to remove any irregularities immediately after strike off. Don’t overwork the surface, or it will deteriorate. Edges can be tooled into the concrete at this point. Before proceeding with the final finishing, the surface bleeds water must evaporate. Finishing operations should be able to begin almost immediately if the concrete is properly specified. The final finish is achieved with a concrete broom. The surface should be stiff enough before brooming to retain any marks or grooves left by the bristles of the broom. A trowel finish is not recommended because it can make the surface slick and dangerous. The rougher broom finish improves traction. Snap chalk lines to indicate where joints go.
Curing
Curing is one of the most important, but also one of the most overlooked, phases of good concrete construction. Poorly cured concrete is more prone to cracking and is less durable.
Curing should last at least three days and, if possible, up to seven days. Curing methods include using plastic sheets to cover the concrete, continuous sprinkling, or applying a special curing compound. Curing should begin as soon as the finishing operations are completed. Curing procedures may need to be adjusted in areas with colder temperatures.

Jointing
Concrete pavement joints regulate the location and spread of cracks. They can be hand-tooled or saw cut, and should be no less than one inch deep for a four-inch-thick slab. For a four-inch slab, joints should be no more than 10 feet apart. Driveways that are 12 feet or wider must also have a joint down the center. Panels should be as square as possible, but the long side should never be more than 112 times longer than the short side. After the finishing operations, jointing should begin as soon as possible. Proceed with a hand groover for jointing when the concrete withstands foot pressure with only a 1/4 inch indentation. Begin sawing within 24 hours if necessary.
Aftercare
One of the most significant advantages of using concrete is its durability and ease of maintenance. All exterior concrete exposed to freeze/thaw cycles should be sealed with a high-quality sealer. The sealer protects concrete from two things: absorbing moisture and being damaged by frequent freeze/thaw cycles.
There are numerous brands of curing compounds, sealers, and penetrating sealers available; here are two examples:
There are acrylic-based liquid copolymers. They are clear and act as a film on the surface. This type of product has been on the market for many years and is popular due to its high value for money.
Clear silane solutions that penetrate deeply and chemically react with cementitious surfaces are referred to as penetrating sealers. They provide the best resistance to moisture penetration.
There are many different types of sealers and can be applied by brush, roller, or by using a low-pressure airless sprayer. The application should be made per the manufacturer’s instructions.
By following these installation guidelines and combining them with good workmanship, you’ll have a concrete driveway that will make a lasting impression for many years.
Are You Looking for a Company to Build a Brushed Concrete Driveway for Your Home?
Spaulding Concrete has been the SF Bay Area’s top concrete builder for over 30 years. We’re here to build your new driveway, no matter what problem may exist. We have the specialized equipment, services, and professional experience that you need to make permanent improvements to your building’s foundation. To get you started on the right foot, we would be happy to give you a free quote for the repair of the foundation. When you reach out by phone or email we will have one of our foundation experts answer any questions you have and explain how we can restore integrity and structural stability to your home or company building permanently. Successful concrete projects require careful planning and thorough preparation. Spaulding Concrete reviews the site and designs to ensure that the concrete and base structure follows the criteria for the planned use and that the layout and finishes are suitable for the project. The qualified concrete experts at Spaulding Concrete will be on schedule, on budget, and meet or exceed standards by careful planning, professional execution, and strict quality control.
To schedule your free quote, contact us today! We are proud to serve Orinda, Lafayette, Moraga, Pleasant Hill, Concord, Martinez, Pittsburg, Antioch, Brentwood, and the surrounding areas.

