What Permits Do You Need for Foundation Repair in California Counties?
What Permits Do You Need for Foundation Repair in California Counties? To do foundation repair in California counties, a building permit from the local city or county building department is almost always needed. All counties have slightly different rules, though most will require submission of plans, payment of a fee, and an inspection all before work commences. Perhaps local codes require special soil reports or engineered drawings. This really all depends on how big the work is and how old your home is. In larger jurisdictions such as Los Angeles, San Diego, or Alameda County, a permit ensures the repair is up to date with new safety codes. Failure to obtain the appropriate permit can result in fines or halt your project. To ensure everything goes as planned, being informed about your county’s regulations and having all necessary documentation is essential. Our step-by-step guide to obtaining a permit outlines what you can expect as you begin the permit process. Key Takeaways Repair work that requires permits In the state of California, permits are required for nearly all foundation repair work. These permits are important for ensuring your work complies with the high safety and quality standards outlined in state and county laws. Each California county will have its own specific permitting processes, documentation requirements and associated fees. Always consult your local building department before beginning any repair work to make sure you have everything necessary! Zoning laws, environmental regulations, and seismic safety requirements have a huge impact on your permit needs. This is especially the case in seismically active areas like the counties of Los Angeles, San Francisco, and San Diego. By working with a trusted licensed contractor, you’ll be in good hands. Their nuanced understanding of local permit procedures reduces the likelihood of costly mistakes, enforcement actions, and subsequent legal or insurance complications. Skipping permits can lead to substantial fines, lower property values, and major headaches with insurance claims or resale, making compliance a smart investment in your home’s future. Be aware that code revisions are still in progress. Keep comprehensive records of each permit and inspection, ensuring adherence every step of the way to safeguard your investment! Why Permits Are Your Best Friend Permits aren’t just some annoying paperwork. They are the framework to any safe, legal and long-term foundation repair in California’s 58 counties. While the process may seem slow or even bothersome, permits protect both your home and your wallet by making sure every step meets strict local standards. Across California, from Los Angeles to Sonoma, permits are a key part of how counties keep homes up to code, especially in areas that face earthquakes or shifting soils. Most critically, the homeowner needs to ensure that all necessary permits are obtained before any work begins. Protecting Your Biggest Investment California’s building codes regularly change. These amendments address primarily seismic safety and energy efficiency, meaning the current standards may be different than those a few years back. First, permits make sure your repair work is in compliance with these local rules, which reduces the potential for half-finished jobs or hidden defects. If repairs go ahead without permits, you could face stiff fines or delays. Sometimes lenders won’t even finance a property if unpermitted work is found. Take the right steps with permits to safeguard your greatest investment. By doing this simple action, you can help save yourself legal headaches that could arise decades down the line! Ensuring Safe, Sound Repairs Permit requirements often mandate on-site inspections by city or county officials. This inspection process ensures that your contractor is held accountable to the highest standards of safety and safety codes—from having stable footings to proper drainage. This system has the effect of holding contractors to a higher standard and provides you with documented proof that the job was completed correctly. In counties that are prone to earthquakes such as Alameda or San Francisco, these checks are imperative to the long-term strength of your foundation. Boosting Your Home’s Future Value Buyers will appreciate the confidence that permitted and approved repairs provide. If you do end up selling one day, having comprehensive documentation will likely put you ahead of the pack. These documents will prove that you complied with every code requirement. It’s an indication that your home has been lovingly maintained, is truly market-ready, and will bring in the highest possible price in California’s competitive real estate climate. The Peace of Mind Factor Permits provide peace of mind. You know that the work is legal, safe, and state-of-the-art. Regular inspections along the way lead to fewer surprises down the road and keep your contractor honest from start to finish. California Foundation Permit Essentials Foundation repair in California has a very complicated permitting process. It’s further complicated by the frameworks set at the state level and the idiosyncratic foibles of county-level implementation. Before starting any repair, homeowners and professionals need to grasp how statewide codes set the baseline, while local agencies often add more layers. The permitting process isn’t simply a formality. It provides an important protection to make sure new homes are built to modern safety standards in a state with a rich history of earthquakes and complex soil types. Knowing what to expect uniformly statewide can save you valuable months of frustration. Plus, just knowing what could possibly be different in your county allows projects to advance with less unexpected quirkiness. Statewide Rules vs. County Quirks California law states that you need a Building Permit to undertake or complete any foundation repair or replacement, regardless of size. As a state, California depends heavily on the International Residential Code (IRC) as its starting point. It does enforce regulations through the California Building Code (CBC) and California Residential Code, regularly amending both to increase seismic safety. These standards are statewide, but each county—and in many cases, each city—interprets and enforces them their own way. For example, Los Angeles County is known for strict seismic retrofitting requirements, while Marin County often scrutinizes projects near hillsides for landslide risk. While
Which Foundation Repair Method Is Right for Your California Home?
Which Foundation Repair Method Is Right for Your California Home? Choosing the foundation repair method for your California home depends largely upon the soil types in your area. Additionally, take into account earthquake hazards and what type of foundation you’re working with. In California, slab foundations typically only need some form of crack patching or epoxy repair. Lifted foundations may require pier and beam support or replacement posts. Rust-proof solutions are ideal for coastal homes, where moisture and salt can penetrate and weaken repairs. In earthquake-prone areas, the use of steel piers or seismic retrofitting through piers can provide additional security. Choosing the right method requires consideration of soil movement, moisture, and building codes. The main body covers the main repair methods used in California, how they work, and how to match them to your home’s needs. This way, you know what fits best for long-term safety. Key Takeaways California’s unique foundation challenges As one of the most seismically active states in the U.S., California is no stranger to the need for foundation repair. These considerations render individualized repair solutions necessary. Selecting the right foundation repair method depends on your specific foundation type, soil conditions, and the nature of the damage, so professional assessment and soil reports are crucial steps. To provide long-term protection in earthquake-prone areas of California, seismic retrofitting is needed. Further, appropriate drainage measures help meet code requirements in regions where water can damage foundations. Polyurethane foam injection, steel push piers, helical piers, concrete underpinning, and advanced waterproofing each provide unique benefits. They differ in price points and suitability for addressing various types of foundation issues. Early detection of foundation distress through regular inspections and prompt maintenance helps minimize repair costs and prevents major structural issues. Always work with licensed California professionals. They have demonstrated local expertise and will obtain the necessary permits to guarantee your repair efforts comply with regional standards and regulations. California Foundations: Unique Challenges California is home to a variety of soil types and water tables, as well as severe seismic risks. In addition to these statewide factors, several local factors exacerbate stress on home foundations. Even a simple slab or pier system requires adjustments. These modifications make it possible to manage a special cocktail of soils that are increasing, seismic exercise, water challenges and coastal salty air. Homeowners can go a long way towards choosing the correct repair technique for their unique area by understanding these three facts. Expansive Soils: The Ground Beneath Most areas of the state rest atop clays that expand with moisture and contract with aridity. This cycle not only stresses but shifts foundations, causing cracks or movement. Moisture is key—a particularly wet winter or bad yard drainage can escalate the situation in a hurry. Proper drainage ensures soil moisture levels remain consistent and prevents soil under a foundation from shifting. Before repairing or rebuilding, perform soil tests. It’s uncovering those risks you’re exposed to and allowing you to better prioritize and select that optimal fix! Seismic Activity: The Quake Factor Seismic Activity: The Quake Factor Earthquakes are just a fact of life in California. They can create new cracks overnight, or worse, move the entire home off its foundation. Seismic retrofitting, such as installing steel or concrete piers, works to stabilize older foundations. The regulations are zero tolerance. Stringent building codes require that all buildings are equipped with earthquake-resistant elements. Just like the true cost of a flood, it’s much cheaper and easier to correct a problem before it becomes a disaster. Water Woes: Too Much, Too Little Basements and crawl spaces in coastal areas, or during years with high water tables, can flood from the ground up. This can lead to erosion in the soil underneath, which can make foundations unsteady and lead to settling. Conversely, drought conditions dry out the soil, causing it to shrink and pull away from foundations. Solutions such as slab jacking or foam injection level the surface. Identifying these early warning signs—such as sagging floors or water damage—can help save you thousands on repairs. Coastal Concerns: Salt and Erosion Coastal concerns include salt and erosion. Salt air erodes concrete and metal. Wave and wind erosion can quickly erode the base of foundations. Homes situated along the coast require targeted defense—physical barriers, sealants, and constant monitoring. Failing to take this step cuts a foundation’s lifespan drastically. Common California Home Foundation Types California homes depend heavily on only a few common types of foundations. These foundations must accommodate the native soil, local climate, and earthquake hazard. The most typical foundation types seen in California homes are slab-on-grade, crawl space (raised), pier and beam, and basement foundations. Understanding these foundation types will allow homeowners to choose the appropriate repair method and budget properly. Each has its strengths and weak spots, though local soil conditions play a huge role in determining what works best. Slab-on-Grade: A Popular Choice Slab-on-grade foundations consist of one thick layer of concrete poured directly onto the dirt. This technique is most effective in places where the earth is solid and parched—as is the case across much of SoCal. Slabs are quicker to build and cheaper in initial costs. First, they are strong against termites and other pests, because there is no wood in contact with the earth. The biggest drawback is cracking, which can occur due to movement in the soil, tree root growth, or in the case of California homes, earthquakes. Many repairs consist of simply injecting epoxy to fill cracks or using piers to raise areas that have settled. Slabs work well on relatively flat sites with solid, stable soils. Crawl Space Foundations Explained Crawl space foundations raise homes a minimum of 18 inches above grade. They are built on piers and beams or stem walls. These are very prevalent in established, older neighborhoods and areas with higher water tables or expansive, shifting soil. The crawl space also provides convenient access to plumbing and wiring. The main problems are moisture, mold, and vermin. It could involve installing new
What Factors Should You Consider Before Starting a Stamped Concrete Project?
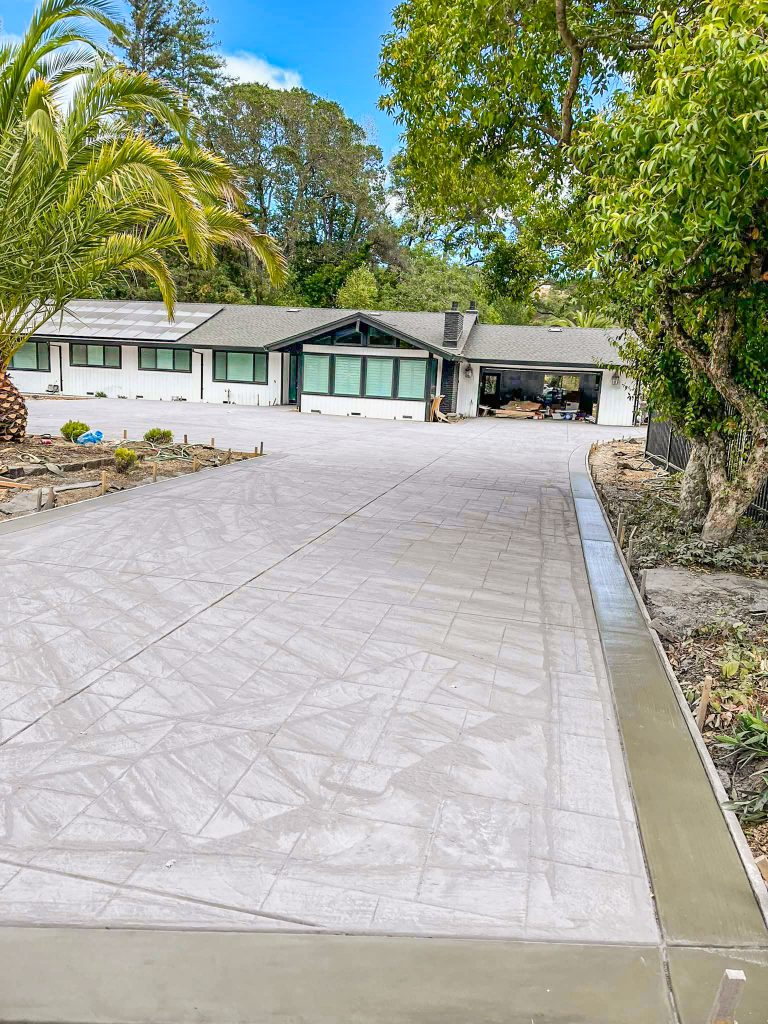
What Are The Biggest Mistakes People Make When Building Residential Retaining Walls? Consider your project scope, design possibilities, and long-term maintenance involved. Identify the space you want to cover, be it a stamped concrete patio, driveway, or walkway. These considerations will directly influence the materials and labor necessary for your project. Your stamped concrete design, patterns, and colors should harmonize with the rest of your space and your personal style without compromising function. Second, maintenance—stamped concrete requires resealing every 2–3 years to maintain its integrity and appearance. There are other considerations too. Budget planning, weather conditions, and contractor experience are huge factors in how well the project goes. Getting a clear idea on all these specifics allows you to properly budget and plan, preventing unexpected issues down the road. For expert guidance tailored to your project, consider consulting with a trusted local contractor like Spaulding Concrete. Let’s unpack that more piece by piece in the sections to follow. Key Takeaways Stamped concrete is a decorative technique that replicates natural materials like stone and wood, offering versatile design options for outdoor spaces such as patios, driveways, and walkways. Planning ahead is key to making sure your project is successful. Check your site for soil type, drainage and nearby obstacles, as well as taking precise measurements to avoid material shortages. Look at your local climate extremes, since these conditions will dictate curing, longevity, and need for maintenance. To keep the concrete surface looking fresh, choose the right sealers and additives to protect the surface. Select your patterns, textures, and colors in a way that enhances your home’s architecture and landscaping. Consider adding dark borders or contrasting accents to your concrete to create a sharper visual distinction. Plan your budget plan ahead by estimating costs for materials, installation, and upkeep. Consider future maintenance, including routine cleaning and resealing, in order to preserve appearance and longevity. We highly recommend professional installation for intricate designs to provide proper site preparation, stamping, and sealing and to prevent costly mistakes. Key Factors Before Pouring Concrete When planning a stamped concrete project, careful consideration of multiple factors can make the difference between a durable, attractive surface and one that requires frequent repairs. By considering these factors from the very beginning, you can be confident your investment will provide beautiful, long-lasting value and enjoyment to your home. Assess Your Project Site Thoroughly Begin by analyzing the type of soil and drainage conditions at your location. Expansive clay soil or insufficient drainage may cause cracks or buckled surfaces in the future. Clay-heavy soil, for instance, will need more preparation work to ensure the area is stable. Identify obstacles such as trees, utility lines, or pre-existing structures that might interfere with the layout, and measure the dimensions accurately to determine material quantities. This allows for sufficient thickness—usually 4 to 6 inches—for a strong concrete slab. Understand Local Climate Impact Weather can play a big role in curing and stamping concrete, so keep these factors in mind. In extreme heat conditions, the slab may lose its strength through rapid drying, and in colder regions, freeze-thaw cycles can lead to crumbling concrete. Select special sealers or additives, such as UV-resistant compounds, to combat regional issues. To illustrate, Luster Seal 350 is a solvent-based, low VOC, clear concrete sealer that’s designed to protect concrete surfaces from abrasives, salts and UV degradation. Plan for Proper Water Drainage Proper drainage will keep water from pooling and will extend the lifespan of your concrete. Design built-in slopes or drainage systems to move water away from the surface. Make sure landscaping does not impede runoff since diverted water can cause staining or washout. Check Necessary Permits and Codes Study your city or county’s building codes and obtain any necessary permits to prevent costly legal complications. Consulting authorities ensure compliance and prevent costly delays. Weighing Stamped Concrete’s Appeal Whether you are currently in the planning stages for a new stamped concrete project or just weighing its aesthetic appeal and functional benefits against drawbacks. This method will help you determine the best option so you can feel confident you’re making a choice that meets your goals. The Upsides: Beauty and Value Aesthetically, stamped concrete can beautifully enhance any space. With more than 75 patterns to choose from, you can get designs that replicate real stone, slate, brick, wood grain, or worn textured surfaces. This level of customization allows you to coordinate with the aesthetic of your home. Even better, it beautifully coordinates with your current hardscapes to produce a unified, finished look. A reclaimed timber texture can help you achieve a truly unique backyard patio. In the meantime, a stone-like stamped concrete finish will improve the appearance of your pool deck. Beyond good looks, the value stamped concrete brings to your property is very real. Improved curb appeal will lure in prospective buyers, helping your home stand out in a crowded market. Its versatility and durability are the most standout features. With little upkeep, such as resealing every three to five years, it has a lifespan of 25 to 30 years. In fact, it can last twice as long, in some cases, even 50 years, giving you an impressive long-term ROI. Potential Downsides to Consider Though stamped concrete holds up well against wear and tear, it’s not perfectly resistant to pitfalls. This doesn’t mean that cracking won’t happen over time—especially if the installation isn’t done properly or if the soil below moves. Upfront costs may be greater than regular concrete, though generally less than that of natural stone or brick. Proper installation by experienced professionals is crucial to avoid future repairs, ensuring the surface remains functional and visually appealing for decades. Understanding the Installation Journey What’s more, stamped concrete offers a long-lasting, beautiful option for exterior spaces. In order to ensure a successful installation, you have to be committed to meticulous planning and deployment. This process takes an average of 3 to 5 days. It’s a journey with specific manufacturing phases that require precision, quality control and conventional industry
What Should You Ask a Contractor Before Hiring Them for Stamped Concrete Work?
What Are The Biggest Mistakes People Make When Building Residential Retaining Walls? The key to hiring the best installer or contractor to work with stamped concrete is to ask the right questions about their experience, portfolio and references. Make sure they have experience with projects like yours and can provide photographs of their completed work. Inquire about how they plan to approach your specific project, what types of stains or mats they’ll use, how they will address site preparation and curing, etc. Knowing their anticipated timeline and if they have a warranty will make sure expectations are set from the beginning. Make sure to go through costs carefully, and be clear about what may be considered extra. Asking these questions will help you better gauge their experience and work ethic, so you can choose the right contractor for the job. Here, we’ll outline important issues to discuss when speaking with a contractor for your stamped concrete. Key Takeaways Be sure to check a contractor’s credentials—including licenses, insurance, and any relevant certifications—to ensure they’re in compliance with local regulations and the best practices of the industry. This ensures your investment is safeguarded, and the risk of future problems is reduced. Question them directly on how many stamped concrete projects they’ve done. Ask for samples of their previous work to ensure they have the experience to handle the design you want and factor in your local climate conditions. Ask the contractor how they plan to get the required permits. This will assist with a smooth execution, avoiding any potential legal or scheduling conflicts. Request a detailed written estimate, clarify the payment schedule, and understand warranty terms to avoid misunderstandings and protect your financial interests. Establish clear communication methods and identify a main point of contact to stay informed and address any concerns during the project. Don’t ignore these warning signs! If they give vague answers, use high-pressure sales tactics, or turn in an unusually low bid, that’s a good indication you can’t rely on them. Why Contractor Credentials Matter Most When hiring a contractor to do stamped concrete work, credentials are about the best indicator there is of professionalism, skill level, and commitment to the craft out there. They help keep your investment safe, while minimizing the risks associated with shoddy work or legal issues. A contractor’s credentials are not just boxes to check but rather proof of their status and commitment to providing the best possible outcome. Protecting Your Investment Seriously With the right licenses and certifications, a contractor will protect your financial interests. Only licensed contractors are required to abide by rigorous standards. This common sense requirement protects us from shoddy work that results in costly fixes. When your contractor is certified by the American Concrete Institute (ACI), you know you’re getting a project built to last. They will ensure that the strength requirements are maintained. This is particularly important for small jobs in projects such as driveways where ACI-certified contractors finish 95% of projects on schedule. Adequate insurance coverage is hands down the second most important aspect. A contractor who has liability and workers’ compensation insurance will relieve you of any surprise project-related expenses should an accident happen while work is being performed. If you don’t ask for this, you may find yourself financially liable for any damages or injury. Avoiding Costly Legal Nightmares Both federal and local requirements credentials can help you comply with local regulations, which can save you a fight—or a fine. Proper licenses prove a contractor knows and follows permitting procedures, a key for ongoing property care for years to come. For instance, a mangled project had the correct permits and approvals been pursued, might result in issues when you eventually decide to sell your property. Experienced contractors, especially those who have been in the industry for decades, bring a wealth of understanding that can minimize costly errors. A company with a stellar reputation—confirmed through third-party sites like the Better Business Bureau—seals the deal on their trustworthiness. Ensuring Project Quality Standards Credentials demonstrate a contractor’s dedication to quality. Certifications—including American Concrete Institute (ACI) certifications—demonstrate a commitment to advanced training and mastery of state-of-the-art industry best practices. Only a certified contractor can deliver precision, defect-free, and durable stamped concrete artistry. This is true for everything from the most residential patios to massive commercial parking lots. Key Questions About Credentials So when engaging a contractor to perform stamped concrete work, knowing their credentials is key to making sure you’ll get quality, compliance and professionalism. Here are the key areas to consider when judging their credentials. Verify Current Licensing Status Begin with requesting evidence of a current contractor license. Make sure that it’s current and released for your state or locality, as this serves as verification that they are compliant with legal mandates. A properly licensed contractor shows that they are serious professionals and accountable businesspersons. Inquire about prior disciplinary actions and rule violations. For instance, a contractor with a good record will be less prolific in violating regulations and providing unreliable service. Looking them up on the Better Business Bureau can uncover more information about their trustworthiness as well. Confirm Adequate Insurance Coverage Ask them to provide proof of liability and/or builder’s risk insurance policies to cover accidents that occur on-site. This shields you from surprise costs as the project progresses. Ensure that your contractor has workers’ compensation insurance that covers their employees. Without proper insurance, you may expose yourself to considerable financial and legal liability, particularly if anyone is injured. Make sure that those policies are up to date and relevant to the project. Check for Specific Certifications Ask about certifications. For example, American Concrete Institute (ACI) accreditation shows subject matter mastery when it comes to concrete work. Relatedly, certifications can draw attention to a contractor’s pursuit of quality, such as ISO certification or LEED accreditation. For stamped concrete projects, ACI certification can be the difference between success and failure. It shows evidence of specialized training and adherence to the industry’s best practices. Inquire About
How Can You Protect Your Stamped Concrete From Weather Damage?

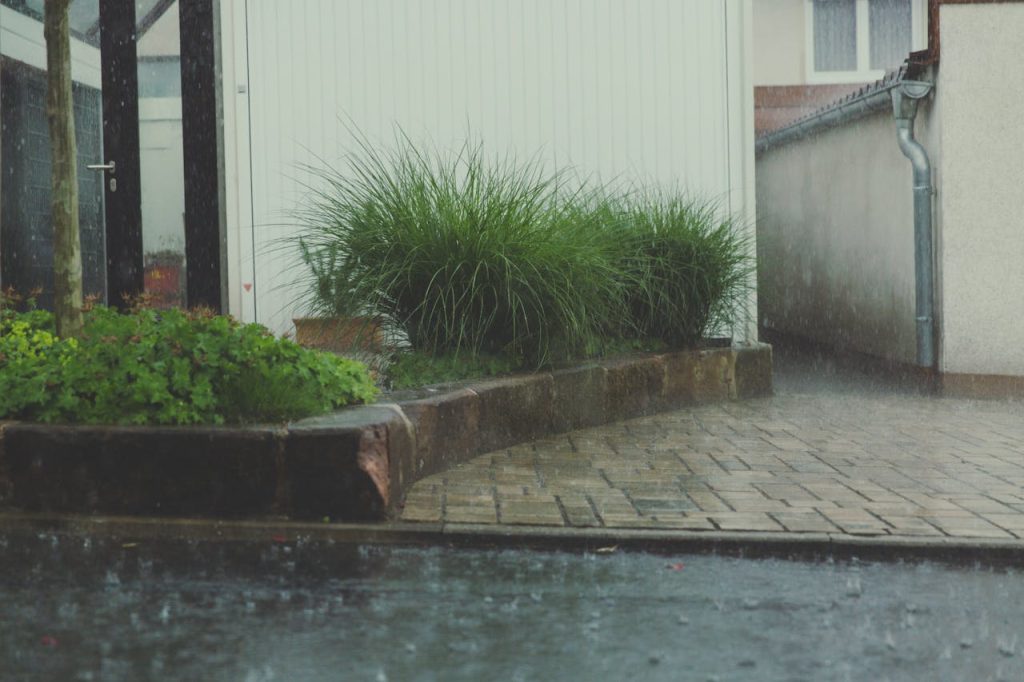
What Are The Biggest Mistakes People Make When Building Residential Retaining Walls? Sealing provides a protective barrier that prevents moisture, UV rays, and temperature fluctuations from causing damage or discoloration. Regular maintenance with a high-quality sealer that’s generally applied every 2–3 years will keep it looking good for decades to come. Wash the surface off periodically with a gentle cleaner and water. This one step prevents dust and debris from scratching the surface and dulling the sealant over time. In cold weather climates, using an agent that is concrete friendly helps prevent further damage from freezing ice and snow. By doing so, you’ll not just protect your investment in stamped concrete, but ensure that it stays in top form for years to come. The upcoming sections discuss additional tips for protecting and maintaining your stamped concrete. Key Takeaways Protecting your stamped concrete from weather damage preserves its aesthetic appeal, maintains your property’s value, and reduces costly repairs. When it comes to maximizing the return over many years, though, nothing is more important than regular maintenance. Unregulated sun, rain, and snow even make routine maintenance of stamped concrete a challenge. Freeze-thaw cycles, heavy rain, UV exposure, and high heat all contribute to cracking, fading and structural damage. Sealing your stamped concrete Apply a high-quality, penetrating sealant every 2–3 years. This practice really is the best way to protect your stamped concrete from moisture, UV rays, and freeze thaw cycles. Make sure the stamped concrete is clean and dry before you apply it. Proper drainage is essential to eliminate water pooling and moisture infiltration. Add landscape designs and drainage systems like improved grading, gutters, and downspouts to keep water away from concrete surfaces. Crews performing regular inspections and quickly addressing cracks or other damage will stop problems before they get worse and more expensive to fix. Fill shallow cracks with resurfacing materials and consult a professional to address more significant issues. Seasonal care, such as removing snow with plastic shovels, applying pet-safe ice melt, and cleaning debris in the spring and fall, helps maintain the integrity and appearance of stamped concrete year-round. What Weather Conditions Damage Concrete? Stamped concrete can withstand unfavorable weather, but different weather conditions present different dangers that threaten the longevity of stamped concrete. Whether it’s freezing temperatures or extreme sunlight, knowing what damages concrete weather conditions will help you better protect, repair and maintain your concrete surfaces. Freeze-Thaw Cycles Freeze-thaw cycles are the most damaging conditions, largely due to the expansion and contraction of water in sub-freezing temperatures. When that water infiltrates tiny cracks or pores in the concrete and then freezes, it expands by approximately nine percent. This rapid expansion can create over 100,000 pounds-per-square-inch (PSI) of pressure, enough to cause internal fissures or even external cracking. Repeatedly, these cycles deteriorate your concrete, particularly if you don’t repair them over time. To fight against this, keep an eye on local freeze-thaw cycles and make sure your concrete is sealed to reduce water intake. Remove de-icing salts the first winter, as they may increase deterioration on stamped designs. Routine inspections are essential to spotting and addressing cracks before they expand. Impact of Rain and Moisture Too much moisture can seep into concrete, washing away its surface and eating away at its structural integrity. Poor drainage makes the problem worse by causing standing water on surfaces. Building systems of drainage to divert water away and putting down quality sealants keeps moisture out. Both approaches prolong the aging of your concrete by stopping saturation from occurring. Effects of Extreme Heat Heat will damage stamped concrete, leading to chronic flaking and cracking, particularly if it’s regularly in direct sun for long stretches. Products such as reflective coatings to lower heat absorption and maintenance done during the cooler hours of the day lower destructive thermal stress. These tactics protect your concrete from surface damage in scorching conditions. Damage from UV Exposure UV rays cause any colors to fade and break down the surface on decorative concrete. UV-resistant sealers offer a barrier against this type of damage. Using shade structures over outdoor areas whenever possible at peak sunlight hours will help maintain your concrete’s look and functionality in the long run. How to Protect Stamped Concrete from Weather? While stamped concrete can add beauty and durability to any outdoor setting, the elements can eventually wear on them. Keeping it safe from the elements takes a proactive approach that includes maintenance, durable products, and thoughtful design decisions. Clean Stamped Concrete Regularly Keeping your stamped concrete clean is essential to prevent debris buildup and staining. Set a weekly or monthly schedule depending on traffic, usage, and weather conditions. While standard cleaning tools like a broom and not-too-powerful power washer can easily keep your concrete looking great, a gentle soap solution is recommended for regular maintenance in order to protect and preserve the surface from wear. For spots that require a little more effort, use a soft-bristle scrub brush to gently work the dirt free. Apply a High-Quality Sealant Sealants are essential for protecting your concrete from the dangerous effects of moisture and UV rays. Choose a sealer that’s specially formulated for stamped concrete. For optimal results, apply it when the weather will be warm and dry with daytime temperatures between 50°F and 90°F. Make sure the surface is clean and completely dry when you seal it, and don’t apply it if the temperature will be below 45°F. You want an early morning on sunny days, perfect conditions. Be sure to reapply every 2–3 years to keep it protected. Ensure Proper Drainage Water pooling over a long period will certainly erode even the strongest of concrete. Plan your landscape to route water away from stamped surfaces and install drainage systems in areas that require them. Monitor and clear drains or catch basins during rainy seasons to ensure proper drainage is maintained and prevent flooding. Prevent Ice Buildup Shovel snow quickly to limit ice from forming, which may cause surface cracking. Use ice melt products that
What’s the Difference Between Stamped Concrete and Plain Concrete (And Why Should You Care)?

What Are The Biggest Mistakes People Make When Building Residential Retaining Walls? From looks to use cases, stamped concrete and plain concrete are two different products better used for different purposes. Stamped concrete includes depressions and markings that give the appearance of a variety of materials like brick, stone, or wood. With this technique, it brings decorative appeal to driveways, patios and walkways. Plain concrete is just that—plain. Others use the material purely for structure or utilitarian applications, like a foundation or industrial floor. Where plain concrete is all about strength and functionality, stamped concrete brings in beauty without giving up on the toughness. Whether you should choose one or the other depends on your project’s aesthetic goals, budget and intended use. Understanding these differences helps you select the right option for your space and ensures a balance between practicality and design. Let’s take a deeper look at these alternatives. Key Takeaways Plain concrete is an extremely cost-effective, long-lasting, and maintenance-free solution that will work very well in functional applications such as driveways, sidewalks and foundations. As a result, it is best suited for projects where budget considerations take precedence or the need for a pragmatic approach is paramount. Stamped concrete offers enhanced aesthetic appeal with customizable patterns, colors, and textures that mimic high-end materials like stone or wood. It’s an environmentally friendly alternative that increases property value and enhances outdoor design, making it a perfect choice for homeowners today. The installation of plain concrete is straightforward. Stamped concrete requires strict timing, exceptional artistry, and additional steps like stamping and coloring while pouring the material. The maintenance requirements vary on each. While plain concrete is very low maintenance, stamped concrete should be sealed every few years to maintain its look and durability. While both options are equally durable, nature and maintenance can dramatically alter the longevity of your concrete. With some routine maintenance, stamped concrete can last just as long as plain concrete. What’s the difference between stamped concrete and plain concrete, and why should you care? Evaluate these factors to figure out what’s best for you. What is Plain Concrete? With its simplicity and practicality, plain concrete is one of the most popular construction materials ever created. Plain concrete is a durable surface made of a simple combination of water, cement, sand, and coarse aggregates, such as gravel or crushed stone. This simple mixture produces an extremely versatile, durable material that forms the structural basis for much of our built environment. Its low price and easy access have helped cement its ubiquitous use across residential and commercial applications. Basic Definition of Plain Concrete Plain concrete is a pretty stark, severe material, meant to be utilitarian and expressive of structure. It’s commonly delivered and finished to form a plain, gray monotonous surface, providing an aesthetically pleasing yet utilitarian solution. Widely considered to be used for slabs, driveways, and sidewalks, plain concrete offers a proven, stable choice for most construction applications. Though it is devoid of ornamentation, it more than makes up for it with practicality and durability, acting as the workhorse for a multitude of installations. Advantages of Using Plain Concrete Perhaps one of plain concrete’s most incredible advantages is the amount of money it can save on projects. At a cost usually between $7.90 and $12.50 per square foot, it’s much more economical than decorative choices. Its strength and durability are just as astounding, letting it carry immense loads all while standing strong against nature’s most severe elements. Maintenance is non-existent. Plain concrete isn’t a surface that requires weekly maintenance, and with simple care, it can last more than 30 years—which makes for an ideal choice for homeowners seeking long-lasting, durable surfaces. Typical Applications of Plain Concrete Plain concrete is simple, yet ideal for sidewalks, walkways, driveways, and patios. In residential, as well as commercial applications, it’s used for more than just foundations, sidewalks, and utilitarian outdoor areas. Its combined with its ability to withstand everyday wear and tear make it a practical and popular choice. Stamped vs. Plain Concrete: Key Differences When deciding between stamped and plain concrete, it’s important to consider key factors such as appearance, installation process, cost, maintenance, and long-term durability. Recognizing these distinctions can help you determine which option aligns best with your project goals. Feature Stamped Concrete Plain Concrete Aesthetic Appeal Provides decorative design options that can resemble materials like stone or wood. Features a clean, uniform look without decorative elements. Cost Typically involves a higher initial investment, with perceived added value. Generally more affordable upfront, making it a cost-conscious choice. Maintenance May require more frequent care to preserve its appearance and condition. Often easier to maintain with minimal routine upkeep. Aesthetic and Design Variations Stamped concrete transforms mundane patios, walkways, and pool decks into beautiful works of art with distinct patterns and textures mimicking slate, flagstone, and even cobblestone. Unlike plain concrete’s simple gray tone, stamped concrete can be made in any color you want, which is perfect for creating beautiful patios or walkways. Installation Process Explained Plain concrete is mostly mixing, pouring, and leveling. Because stamped concrete is decorative, it takes more work with extra processes such as adding patterns while still wet. In stamping, timing is critical to get the desired design before the surface hardens. Cost Analysis: Initial vs. Long-Term While stamped concrete may come with a higher upfront investment compared to plain concrete, it can offer added visual appeal and perceived value. Design choices range from simple to elaborate, allowing flexibility based on budget and style preferences. Over time, the maintenance needs of stamped surfaces may differ, potentially impacting overall upkeep considerations compared to other materials. Maintenance Needs and Efforts Stamped concrete requires sealing every three to five years to avoid cracking, while the upkeep of a plain concrete driveway is much easier, needing only periodic cleaning. Cold temperatures can do a number on stamped surfaces, particularly under the weight of vehicles or with the use of de-icing salts. Durability and Lifespan Expectations While both are highly
How Do You Keep Stamped Concrete Looking Brand New? Is It Really That Low-Maintenance?
What Are The Biggest Mistakes People Make When Building Residential Retaining Walls? Maintaining stamped concrete is incredibly easy, as it truly is that low-maintenance. Regular sweeping and periodic washing with a pH neutral soap and water will take care of most dirt and grime. Seal it with a concrete sealer every 2-3 years. This will help shield the surface from traffic wear, fading from UV rays, and staining due to bad weather or heavy use. While stamped concrete is often considered low-maintenance, it still benefits from periodic care to maintain its vibrant color and texture. It’s best to fix cracks or small damage ASAP as prolonging the repair will just worsen the damage. Follow these easy guidelines to keep your stamped concrete looking brand-new for years, making stamped concrete a beautiful, long-lasting addition to any home. Scroll down, we’ll discuss each of these maintenance tips in more detail. Key Takeaways Stamped concrete is a versatile and durable decorative option that mimics materials like stone, brick, or tile, making it ideal for patios, driveways, and walkways. Some regular maintenance can go a long way in keeping stamped concrete looking its very best. Regularly cleaning concrete that’s stamped is a must. Step one: Sweep off the surface dirt. Afterwards, wash with water and scrub with mild detergents on stubborn stains to maintain its pristine appearance without harming its surface. As a part of stamped concrete maintenance, sealing needs to be taken seriously to prevent damage from water, stains, and UV rays. Reapply sealer according to the manufacturer’s directions. This will help protect your classic concrete from abrasions and maintain color vibrancy. Fix small problems such as cracks, pits, and fading early to avoid more extensive fixes. They can be repaired using like products to blend in and look original and new. Preventative maintenance, such as avoiding harsh chemicals, protecting high-traffic areas, and using furniture pads, minimizes wear and tear, extending the lifespan of stamped concrete. When it comes to more complicated repairs or maintenance, it’s worth hiring a pro to save your complex concrete project and get long-lasting results. Why Stamped Concrete Maintenance Matters? With its beautiful decorative appeal and resilience, stamped concrete provides a beautiful, durable surface. If you really want to protect your investment, you can’t stop at cleaning. Without regular maintenance, stamped concrete can become tired looking and even begin to fail, but it’s easy to avoid these issues. When you invest in proactive maintenance, you can make sure that your stamped concrete continues to impress and perform for decades. Preserve Appearance and Value You can avoid damage with regular cleaning and sealing. Keeping stamped concrete looking fresh, vibrant and new requires routine maintenance. Over time dirt, debris, and basic stains can make it appear cloudy or foggy. UV rays over time can cause some fading to occur. By resealing every 2–3 years, you’re not just bringing back your concrete’s colorful aesthetic; you’re preventing future damage as well! A beautifully maintained stamped concrete patio or driveway increases curb appeal and even adds to resale value. Neglecting maintenance risks unsightly discoloration or stains, which are much harder to fix than to prevent. Prevent Costly Repairs Neglecting stamped concrete maintenance often results in typical problems such as cracks, efflorescence, or surface deterioration. These issues do not get better under adverse weather conditions like freezing winters or extreme summers. By promptly sealing and cleaning surfaces, you shield them from wear and tear, lowering the chances of costly repairs. For the best savings in the long run, plan for some yearly maintenance and avoid surprise expensive repairs down the road. Extend Lifespan of Concrete Proper care can significantly extend the life of stamped concrete. Simple steps, like regular assessments and resealing, combat environmental factors and prevent UV damage or improper sealing from shortening its lifespan. Some users report their stamped concrete still looks great after 12 years of consistent maintenance, proving its durability when cared for. Essential Cleaning Techniques To maintain the beauty of stamped concrete, regular maintenance and careful cleaning practices are required. Though it is indeed known for being low-maintenance, routine cleaning and care will not only keep it looking its best, but extend its life cycle. Below, we’ll discuss these surfaces in greater detail, and review practical cleaning techniques and tools to keep them safe and clean. Routine Sweeping and Rinsing Sweeping weekly is crucial to remove debris like leaves, dirt, or small rocks that can scratch the surface or mar textured designs. A soft broom or a blower works without scarring fine stamped patterns. When providing light cleaning, always rinse the surface with clean water to flush off any dust and restore its gloss. Rarely, once a month, a deeper rinse can be used to clear out dirt build-up, particularly in areas with high foot traffic. Best Cleaning Solutions Mild detergents like Dawn or Simple Green work very well for regular cleaning. Diluted liquid cleaners are vigorous enough to deal with more stubborn marks but won’t damage the concrete or its sealer. Don’t use harsh chemicals such as bleach or ammonia, which can damage the surface or weaken its protective sealant. Always read and follow product label directions for safe and effective use. Remove Tough Stains For oil or grease stains, use a degreaser and scrub it in with a stiff bristle broom. Efflorescence often leaves a chalky salt-like powdery residue on surfaces. You can just scrub it off with water and a stiff brush, or for more persistent cases go to a dedicated remover. As always, test cleaners on a small, inconspicuous area first to avoid damaging materials with undesired reactions. Pressure Washing: A Guide First, make sure your pressure washer has the nozzle set to wide-angle. Then, hold it at least 12 inches from the surface you’re disinfecting. Be careful not to use excessive pressure, or you could etch the surface or strip the sealer. If you want an even clean, don’t hold the nozzle in one place too long. The Importance of Sealing This is
What Should First-Time Homeowners Know Before Choosing Stamped Concrete?
What Are The Biggest Mistakes People Make When Building Residential Retaining Walls? Here are some things first-time homeowners should know before making the decision to stamp concrete. This makes stamped concrete a versatile, durable, and economical choice for patios, driveways, and walkways. It provides the beautiful look of materials such as brick or stone without the high maintenance and expense. Stamp concrete by imprinted patterns and textures in freshly poured concrete. This procedure allows you to fully control the design, colors, and finishes. Climate, installation techniques, and sealing procedures all must be factored into the equation to get long-lasting performance. Get in the zone and understand what you are learning. This will help you know what’s available so you can decide what works best for your budget and aesthetic. Here in the next few sections, we’re going to outline the biggest factors and most important tips to keep in mind when considering stamped concrete. Key Takeaways As you can see, stamped concrete is an incredibly versatile and functional choice. It doesn’t just lend to a beautiful aesthetic, but it has practical and rewarding benefits. It can give your home the look of expensive materials, such as stone or tile, at a mere fraction of the cost. Choosing stamped concrete is an investment choice that saves you money now and later. It’s durable, low maintenance, and has an efficient installation process, making it a very practical choice for first-time homeowners. Although durable and low-maintenance, stamped concrete is susceptible to cracking and damage from heavy impacts of extreme weather conditions. Correct and careful installation, curing and eventually regular maintenance can go a long way to prevent these issues from occurring. In fact, design flexibility is one of the biggest advantages stamped concrete offers homeowners. Opt for a nearly infinite variety of patterns, colors and textures. Select a color palette that’s the best fit for your home’s style and your own personal aesthetic. Before you embark on your stamped concrete project, consider your local climate, soil conditions and budget. This will help you choose the right materials, designs, and contractors. Beyond that, hiring a qualified contractor with experience in stamped concrete is incredibly important. Read reviews, ask for stamped concrete portfolios, and make sure the contractor you choose provides warranties for your own peace of mind. Disadvantages of Stamped Concrete While stamped concrete offers visual appeal and durability, there are a few considerations worth keeping in mind—especially for those new to using it in home projects. Understanding these aspects can help guide your installation and maintenance decisions. Cracking Potential Stamped concrete may be prone to cracking over time, especially in climates with frequent temperature changes. When cracks occur, they can sometimes be more noticeable than with plain concrete. Proper installation and attention to detail are important in minimizing these risks. Ongoing Maintenance Stamped concrete can require regular maintenance to preserve its look and functionality. Without consistent care, the surface may become more vulnerable to wear. Planning installation carefully and ensuring it is done correctly can help reduce future issues. Surface Vulnerability Environmental conditions, such as seasonal weather changes and certain materials used on the surface, may contribute to wear and tear. Surface treatments like sealing can help protect the concrete, but these need to be reapplied periodically to maintain effectiveness. Hardness and Traction Concerns The solid, textured surface of stamped concrete might not be comfortable for bare feet or prolonged standing. Additionally, it may become slick in wet weather, which can pose a slipping hazard. For some settings, alternative materials may offer a better fit. Potential for Moisture Issues Without proper drainage, standing water can become an issue, potentially affecting the surface over time. Drainage planning and regular sealing can help reduce the chance of moisture-related problems. Key Considerations Before Choosing Stamped Concrete When choosing stamped concrete for your home, it’s important to weigh several factors to ensure a durable and visually appealing result. When it comes to versatility and longevity, stamped concrete is hard to beat, but proper planning will be key to getting the most bang for your buck. Assess Your Local Climate Climate is an important factor in the long-term performance of stamped concrete. In areas that experience a freeze-thaw cycle, concrete will crack if not correctly poured or structured with expansion joints. Only in places with extreme rainfall, like tropical areas, might you need to worry about water seeping in and demand extra sealing. Choose appropriate materials and sealants based on your region’s climate and rainfall averages to ensure longevity. Understand Soil Conditions Soil instability can do serious damage to your stamped concrete. Soil that is too loose or expansive may cause your concrete to shift and crack. Carrying out a soil test will make sure that the ground is stable enough to support stamped concrete’s installation. Incorporating compacted gravel under the slab can make a difference from a longevity perspective and prevent future problems from developing. Define Your Budget Whether by square foot or total installation, costs differ considerably as well. Basic designs start at $8 and go up to $12 per square foot, but custom projects can go over $18 per square foot. Consider the total scope: design, installation, and maintenance. Budgeting in money for periodic sealing or sudden emergencies helps you stay ready for the long haul. Explore Design Possibilities Stamped concrete offers five main pattern types: Brick, Stone, Slate, Wood, and Texture. The majority of designs will apply only a base color and an accent color. Choose colors and patterns to enhance—not replicate—what’s already there for a seamless appearance. Research Contractors Thoroughly By hiring an experienced contractor, you can be confident that your choice will yield long-lasting results. Conduct Thorough ResearchOnce you start the process, read reviews, request referrals, and compare detailed quotes. Professionally installed DIY isn’t an option, as stamped concrete is highly complex to install. Stamped Concrete Design and Styles Whether used outdoors or indoors, stamped concrete provides an incredibly realistic, versatile design option without sacrificing durability or low maintenance. Its flexibility
What Is Specialty Stamped Concrete and Why Is Everyone Suddenly Obsessed With It?
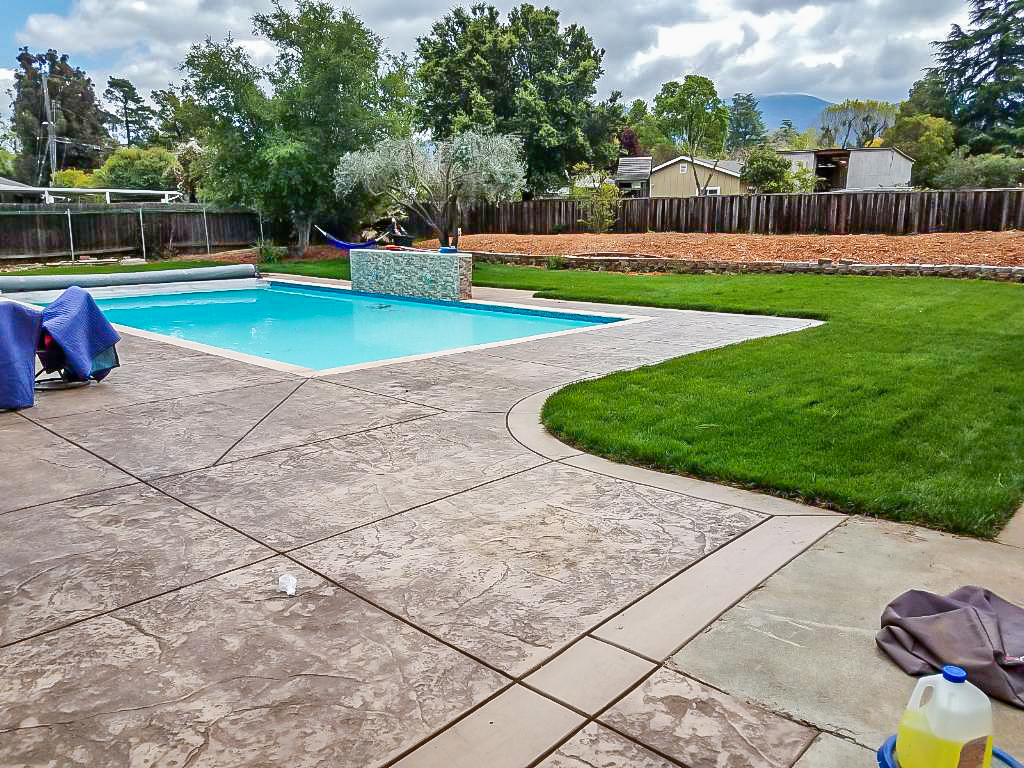
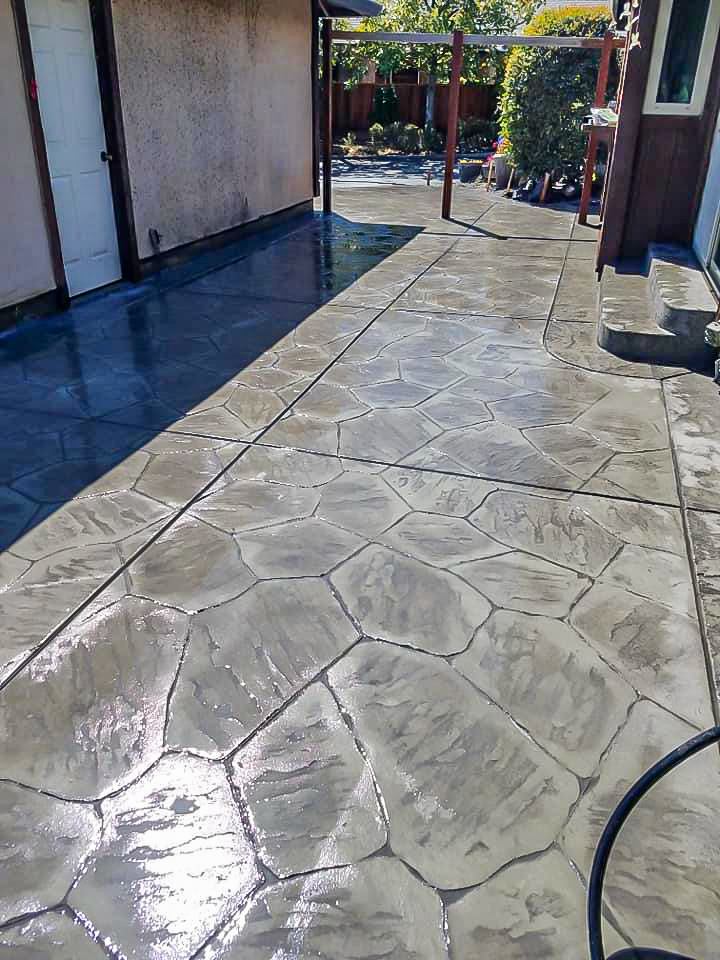
What Are The Biggest Mistakes People Make When Building Residential Retaining Walls? With specialty stamped concrete, you have a beautiful, decorative option. It creates the appearance of more expensive materials like brick, stone, tile and hardwood by stamping detailed patterns and textures onto freshly poured concrete. Combining beauty with toughness, it’s no wonder that specialty stamped concrete is a top pick for patios, driveways, walkways and pool decks. What sets it apart is the ability to customize colors, patterns, and finishes to suit any design style or preference. Its low maintenance and cost-effectiveness compared to natural materials has fueled its rising popularity. In the sections ahead, we’ll explore its benefits, common uses, and design possibilities to help you decide if it’s the right option for your next outdoor or indoor project. Key Takeaways Specialty stamped concrete is a decorative technique that replicates natural materials like stone and wood, providing a cost-effective and visually appealing alternative. The technique employs specially manufactured stamps and mats to achieve unique patterns and textures on poured concrete slabs. This improves the aesthetic appeal and practicality of the concrete. Yet despite its increased popularity, the driving forces behind its booming popularity are affordability, design versatility, and social media sharing of gorgeous installations. Homeowners have access to endless pattern, color, and texture options that allow them to create one-of-a-kind outdoor spaces that easily blend with current landscaping. With concrete, proper installation—from surface preparation to stamping, coloring, and sealing—is key to success and there’s no getting around it. Proper care, including periodic cleaning and resealing, will keep specialty stamped concrete bright and strong for years. What is Specialty Stamped Concrete? Specialty stamped concrete provides a unique decorative stamped concrete solution to improve upon standard poured concrete. It changes the entire flat surface to resemble costly materials like expensive stone, slate, or wood. Artisans work with specialized stamps and mats to imprint detailed patterns and textures on newly poured concrete. This artistic journey marries practicality with beauty, yielding jaw-dropping patterns and effects. It’s commonly accented with color additives and sealers, creating rich, seemingly alive surfaces that can transform any exterior or interior. This colorful and creative method can be implemented in a myriad of ways including patios, driveways, pool decks, or walkways. Define Specialty Stamped Concrete Unlike regular concrete, specialty stamped concrete is designed with creativity in mind. Artists professionals are masters at the application of pigments and texturing tools. They produce imitations of natural materials and unique textures that can look like uneven flagstone or reclaimed wood boards. The art is in the layering of these textures and colors to provide a finished and natural appearance. This technique needs a high level of craftsmanship to make sure patterns match up perfectly, in particular with intricate designs. Specialty vs Traditional Stamped Concrete Their unique designs provide a wider variety of complex textures and patterns than conventional designs of stamped concrete. With cutting-edge methods, they can be totally personalized, varying from custom shapes to rich, multi-tone finishes. It’s more durable as it can be sealed and therefore withstand a lot more wear, making it perfect for high-traffic areas. Proper maintenance, such as pressure washing, helps maintain its beauty and durability with a lifespan of over 20 years if well maintained. Factors Driving Recent Popularity Add increased demand for backyard renovations and the low cost versus natural stone, and you’ve got a highly marketable specialty stamped concrete. Social media showcases its versatility, inspiring homeowners to explore customizable designs. Advantages of Specialty Stamped Concrete Specialty stamped concrete has become a popular choice thanks to its appealing look and functional benefits. Whether used for a driveway, patio, or walkway, it can offer a blend of style and utility for both residential and commercial projects. Enhanced Aesthetic Appeal Stamped concrete can enhance outdoor spaces through a wide range of design possibilities. From intricate patterns to natural stone textures, it opens the door to creative design expression. It can complement surrounding landscaping and architectural features, making for a cohesive visual effect. Property Appeal When designed thoughtfully, stamped concrete can contribute to the overall visual charm of a property. Decorative surfaces like patios or driveways may leave a positive impression on visitors or potential buyers. Design Flexibility for Various Uses Stamped concrete can be tailored for both practical and decorative purposes. It works in areas such as driveways, garden paths, and patios, helping to create a consistent look throughout outdoor spaces. Customizable patterns and colors allow for personalized design solutions. Improved Curb Appeal Professionally designed stamped concrete surfaces can help enhance the entry points of a property. When design elements are well-coordinated, they can offer a polished and welcoming exterior appearance. Explore Finishes, Styles, and Colors With superb choice in finishes, styles and colors, specialty stamped concrete creates stunning masterpieces for your outdoor spaces. It replicates high-end materials such as stone, brick and wood. This provides you the look and feel of lavish, expensive materials at a fraction of the cost. Patios and walkways allow homeowners to create settings that show off their individuality. These dynamic features enrich their environment and establish their surrounding outdoor area as a beautiful destination. Popular Stamped Concrete Styles Stamped concrete styles come in classic styles including brick, cobblestone and flagstone. Geometric patterns offer a more classic and structured look, making them great for pathways or driveways. Adding a historical, old-world charm that conjures up European streetscapes, cobblestone is the ideal choice for patios and walkways. Flagstone remains a top choice thanks to its natural beauty and rustic elegance, turning any space into an inviting outdoor oasis. An ashlar pattern, set with pauses that soften the lines, creates an almost sculptural quality—elegant and eye-catching while still maintaining an organic spirit. For a truly unique design, mixing different styles—like using cobblestone borders with a flagstone interior—adds to the charm and beauty. Pay attention to what suits your house’s architecture and overall outdoor theme when choosing finishes and styles. Color Options for Stamped Concrete Colors play an important role in outdoor environments,
What’s The Difference Between DIY And Professional Retaining Wall Installation?
What’s The Difference Between DIY And Professional Retaining Wall Installation? Key Takeaways Retaining walls are an important part of soil management and erosion control. Beyond their key purpose of providing structural support, they beautify outdoor areas, bringing both form and function to natural environments. Besides the money DIY installations save, there is personal satisfaction as well. They require a lot of time, equipment, and know-how to ensure proper structural integrity and compliance with local building codes. Professionally installed retaining walls offer outstanding efficiency and expertise. They tend to cost more upfront, but they deliver long-term value by providing durability and, typically, services such as permitting and quality assurance. Correct design, drainage, and foundation preparation are all critical to installation longevity and performance. Oversights or miscalculations in these areas will result in costly repairs or, worse, failures in the future. Considerations such as project size, complexity, and skill level should determine your choice between DIY and professional retaining wall installation. For larger or more complex projects, it’s usually advantageous to have professional oversight. Hiring a professional is recommended for complex projects, sloped or unstable terrain, or when strict building codes and safety concerns are involved. The expertise, tools, and time needed are the main differences between DIY & professional retaining wall installation. DIY projects usually appeal to crafty people who enjoy working with their hands and would prefer to avoid paying for professional labor. These projects require thoughtful consideration, appropriate material selection, and knowledge of construction fundamentals. Professional installation ensures beautiful, durable, and effective results. By hiring a professional, you have greater access to specialized or expensive tools and ensure adherence to your local building codes, which are critical for maintaining long-term durability and safety. Wall height, soil type, and drainage systems are key elements to take into account. Here are some factors that can sway you toward handling the installation yourself versus getting professional help. Below, we’ll explore these differences in depth. We want to equip you to choose what’s best for you and what aligns with your own goals and priorities. DIY VS. Professional Installation: Overview Deciding to build a retaining wall yourself or hire a professional is important, and these methods come with their benefits. DIY projects are ideal for home improvement enthusiasts who relish the challenge of a hands-on project and want to avoid the expense of professional labor. For smaller walls under four feet, a DIY approach may seem manageable with basic tools like a shovel, level, and wheelbarrow. Installation is about more than just the labor involved. It takes detailed design, thoughtful engineering, appropriate material acquisition, and construction to create a place that will endure. With no second chances to get soil type, drainage, and structural integrity right, even small errors in installation can result in major repair expenses. The expertise involved with professional installation is substantial. Specific to contracting work, contractors are familiar with local building codes, soil conditions, and best practices for building long-lasting structures. For instance, they ensure the right materials—whether concrete blocks, natural stone, or timber—are used to handle the specific load and environmental factors. While getting professionals is more expensive upfront, usually costing $3,000-$8,000 depending on the size and design, this investment does provide some peace of mind. The project was completed efficiently and correctly the first time, avoiding potential risks like collapse or water damage. At the end of the day, the decision is up to your skill level, budget, and time availability. DIY installation is significantly less expensive but requires considerable research and shoe-leather involved, while professional installation assures reliability and expertise. Homeowners are spending nearly $15,000 a year – on average – per homeowner… on home improvements. By considering these aspects thoughtfully, you’ll be able to build a DIY retaining wall that will last. What’s The Difference Between DIY And Professional Retaining Wall Installation? Whether you’re deciding to install a retaining wall yourself or hire a professional, understanding the main differences is important. Now, you can go forth and confidently make the right decision. A few other considerations will help determine how to tackle your project. These factors range from level of complexity, needed skills, and tools to regulatory requirements and the need for long-term maintenance. Project Complexity And Scope For the most part, do-it-yourself retaining wall projects can only be done on small, simple jobs. For example, building a 3-foot garden wall might be manageable if you have time to plan and have basic construction knowledge. On bigger projects, like terracing a sloped backyard, that requires more complex designs, heavier materials and more elaborate drainage systems. This is where professionals excel in the face of these complexities. They reduce the chance of costly mistakes, like improper drainage or loss of stability, that lead to costly repairs later. Skillset And Required Expertise Building a long-lasting retaining wall takes more than just placing some stacking blocks. That means careful leveling, backfilling, and knowledge of soil mechanics. An experienced DIYer could certainly take on smaller projects, but seasoned professionals such as those of us here at Hammer Excavation, come with years of knowledge and experience. We guarantee the structural integrity and longevity of the wall, integrating innovative engineering principles with an intimate understanding of Melbourne’s distinct conditions. Tools And Equipment Accessibility Professional wall builders utilize advanced equipment and technology. Professionals have access to specialized equipment like plate compactors and laser levels. Access to the right tools means not only getting the job done faster but delivering quality workmanship. Renting or buying specialized tools can significantly increase the cost of DIY projects, further closing the cost gap. Understanding Local Building Codes Following local building code requirements is very important. Ignoring regulations can result in costly fines or legal challenges. Expert builders who know the ins and outs of Melbourne’s standards will take care of necessary permits quickly, saving you time, money, and frustration. DIY Retaining Wall: Advantages And Disadvantages The thought of constructing a DIY retaining wall is incredibly enticing for a host of reasons. It comes with